Pages

Wednesday, September 19, 2012

Burns Bog: Delta, BC || Travel

It's been a busy couple weeks since the school season started up. Haven't had the time, until today, to pick up my camera and snap some shots. Today's destination: Burns Bog, Delta, BC. I know this isn't anything exciting like Mexico or Hawaii, but it's still a destination with lots of cool things to take pictures of.

My friend Samson needed to take some pictures for a school projected and asked me if I wanted to be his buddy for the day. Thank goodness I didn't have work :) So off we went bright and early (okay so 8:30 isn't that early) and set off to Burns Bog. Because we were on a time crunch (Samson had class at 2:30), we only had time to walk around the outer part of the bog. We didn't end up seeing the actually bog (the watery parts) but we still got some good shots of the boardwalk trails. I'll be up in Delta again this Sunday; maybe I'll be able to get a few snaps of the bog.


Love trees! This one had some kind of sticky substance on it. I don't even want to know what it can be. 

Sun peaking through the trees

Skunk Cabbage! That part of the trail smelt really bad.


Squirrel! This little guy just stopped and stared. Didn't even move a muscle!


Haha! So this isn't a eatz or beauty treat (obviously). Hopefully be posting a beauty treat sometime in the near future. But that's it for now :)

Friday, July 6, 2012

Richmond Night Market || Eatz

Summer is finally here in Vancouver, BC! This is officially the first week where we've had sun for a whole week! So exciting. Now that the sun is out..time for some food adventures. This time we are going to head over to the new Fido Richmond Night Market. Located right beside the River Rock Casino, in Richmond, this can be easily spotted with it's bright tents. You can either drive (free parking) or take the Skytrain (stop: Aberdeen Station). They are charging $1.50 as an admission fee; a small price to pay for GREAT FOOD!


The night market is most known for its eatz; about 50% of the vendor stalls are some how food related. We have the tradition foods like dim sum or bubble waffles but, recently, vendors have been more creative in what they sell. 


First stop! Dim Sum! Siu Mai - traditional meat dumpling. Mmmm :)


Looks gross but so good; octopus legs!


So this stall (and all other similar ones) has given people the crazies for the past few years. These guys sell the imfamous potato hurricanes. Pretty much, its a potato that's been shaved into a spiral, deep fried, and then salted with flavoring. We ended up getting cheddar cheese, ketchup, and roasted garlic. SOO GOOD!!


This is a must eatz! Takoyaki is a japanese street eatz that was the original popular item at Richmond Night Market (and it still is). Its pretty much a doughy ball filled with veggies and tako (octopus). They also have a scallop version and a veggie one too!


This was our last stop for the evening: MEGA CHICKEN! The reason for this name is for their XXL chicken cutlet. Seriously, its huge...like the size of my face. We didn't want the meat sweats so we decided just to get the Taiwanese popcorn chicken; plus it's easier to share.


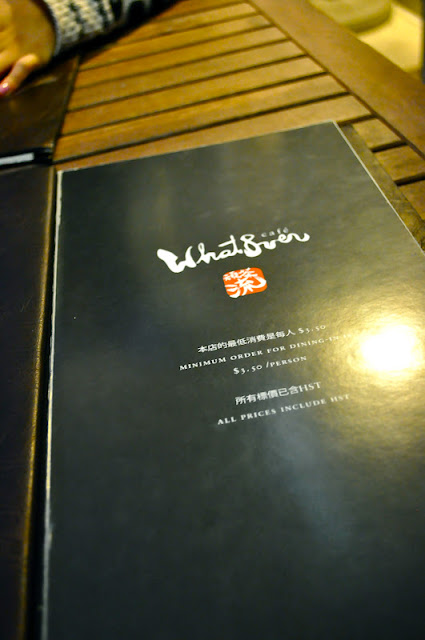
We didn't want to go back home yet, so we stopped by What8ever Cafe for some drinks and a last minute snack to end the night. The mug was so cute; they had them for purchase but I had to control myself.


Fido Richmond Night Market
8351 River Road, Richmond BC

What8ver Cafe
1108-8328 Capstan Way, Richmond BC

Wednesday, April 25, 2012

Liese Bubble Hair Colour || Product Review

Time to re-dye my hair! The last time this was done was maybe in October and I can definitely see my natural hair color near the roots. So I thought it would be fun to do a quick product review.

I use to use the normal drugstore dyes like herbal essence or l'oreal. But I found that they didn't take to my hair when it came to color -- that's because my hair is naturally dark. So by the time I was done waiting for the dye to set, the color never change. But then I found the solution: Liese Bubble Hair Colour! Bubz from Bubzbeauty did a tutorial on how she dyed her hair and I loved her results! After this, I decided to try this product out. This dye is really hard to find, here in Vancouver, and if you do find it, it's pretty expensive. But I was lucky -- I knew a few people that were heading to Hong Kong and they helped me out  :) I've used several colours from this line and, every single time, it's turned out great! Easy to use, easy to clean up, it didn't stain my scalp (the worst), and the results are amazing!

Here's the quick info burst!

Where is it made? Product of Japan
How much did it cost me? $120HK - $140HK (roughly $15-20 CDN) per box.
Easy to use? The instruction sheet is super simple (has pictures to follow if you're not the reading type). The instructions comes in English, Chinese, and Japanese.
Some great things to mention:
It's foaming! I've used dyes which were in liquid form and the only way I was able to dye my hair with that was to get someone to help me. With the foaming formula, you can use it like shampoo! Another plus to this is that it doesn't dye my scalp as much as other dyes I've used. This works much better for dark hair; I'm guessing that it's made for asian hair (darker color).

What's in the box?
- instructions
- 1 bottle of dye (2 components)
- 1 pump
- 1 package of nourishing hair aftercare
- latex gloves


Things you will need
- 1 box of Liese Bubble Hair Colour (2 boxes if you have really long hair or just a lot of hair)
- a shirt that you don't care for
- clips (to hold up layers)


Before shot! Excuse my hair (morning hair)!
(Last dye used: Lieole Bubble Hair Colour "Platinum Beige")

Super Easy Steps!
  1. Wash your hair the night before and let it naturally dye.
  2. The next day, you can dye your hair. Just follow the instructions on how to mix it. Section off your hair into layers (I only needed three layers). Use as much of it as your hair allows. Refer to the link above to watch Bubz do if you need some visuals.
  3. Let the dye sit for 30mins. The package said up to 30mins, but I left mine in for a tad bit longer just because my roots were so dark. Watch a movie or a tv show. 
  4. Rinse, shampoo twice, and condition. I would suggest using a shampoo and conditioner that is specifically for coloured hair. This insures longer lasting colour. Right now I'm just using Herbal Essence's "Colour Me Happy" in shampoo and "Hello Hydration" in conditioner.
  5. Apply nourishing hair aftercare. You only need a little bit (around the size of a quarter).
And Voila!


Sorry for the "pixelly" quality. Shot with my android.
Colour "Milk Tea Brown"


Saturday, April 14, 2012

Blossoms and Sunshine || Spring Time

Here's a quicky! I shot these yesterday right in front of my house while I was waiting from my ride. My camera hasn't seen natural daylight in months and it was nice to bring it outside again. These are just my favorite selections :) The cherry blossoms are in full bloom and, in a couple weeks time, they will become little leaflings (if that word even exists)! And you can't go wrong with moccasins -- bought them down in the States for a steal!

Oh! All you instagram-ers, I had an android now! So if you want to follow me, my username is nessahui. Follow me and I'll follow you :)


Next post: PRODUCT REVIEW!! FIRST ONE EVER!! GET READY!

Sunday, April 8, 2012

Bunnies and Mini Eggs || Nail Art

Happy Easter everyone! I wanted to post this one up yesterday night but ended up having to do a favor for my mom. So I know today is Easter and this is an easter nail tutorial but I think you can still wear this even when it's not Easter. Super easy to do and lots of fun! A couple of my favorite youtubers did some nail tutorials based on Easter themes! At first I was just going to do one of them but then I decided to mix and match.

Michelle Phan's Easter Nails
http://www.youtube.com/watch?v=XRq7kz8JKbA&feature=g-u-u&context=G25e4913FUAAAAPAACAA

Cutepolish's Bunny Nails
http://www.youtube.com/watch?v=bHBGYuM-vYk&feature=g-u-u&context=G234622bFUAAAAWgALAA

BubzBeauty's Pastel Bunny Nails
http://www.youtube.com/watch?v=UmB9BzmObGY&feature=g-u-u&context=G28e88c3FUAAAAAAAGAA


Here's my first attempt and I wore them for a few days. Got a whole bunch of positive comments!


I thought they weren't too bad but i found it was hard to match my outfits. So I decided to redo them. Alright here we go!

Colours used:

OPI Heart Throb (Light Bubble Gum Pink)
OPI Alpine Snow (White)
Sally Hansen Sheer Me Now (Light Nude/Peach)
Sally Hansen Raven (Black)
OPI Base Coat and Top Coat

1. Apply Base Coat.

2. Apply pink to thumb, middle, and pinky finger. Apply nude to ring finger. I had to apply a good three - four coats to get it to a solid shade. On the pointer finger, paint tip of nail with a curved edge (the head) and two ears with the white. I used a really thin tipped paintbrush to get the ears like that. Let dry.


3. With a nail art tool or a bobby pin, draw in your dots on the nude nail (pink polka dots) and all the pink nails (white polka dots). They can be as big or as small as you want them to be. For the bunny, use a nail art tool/bobby pink/paintbrush to paint the insides of the ears and the nose with the same pink. Use black nail polish for it's two eyes.


4. Apply Top Coat and you're done!


I hope you guys try this out -- just takes some time and patience :)

Remember, Easter isn't just about the chocolate eggs and the bunnies. This is the day when Jesus Christ rose from the dead to fulfill the promise that God had made. Christ is risen! He is risen indeed!

Monday, April 2, 2012

Inspriation via Youtube || Project April

Bahaha so much for my promise for posting at least two post each month. Sorry -- month of March was pretty busy and, sadly, haven't had much inspiration. I wanted to take some photos outside but the weather over here in Vancouver hasn't been the best. Since the weather hasn't been the greatest, I've been catching up on my youtube subscriptions to amazing people like Michelle Phan  and Bubz from Bubz Beauty. Love their videos -- their fashion and beauty advice are easy to follow! So I've decided to blog my responses to their videos by actually doing them! So I'm super excited for this month! Got a whole bunch of ideas for April - going to attempt a haul blog, some more nail art, and some product reviews. Maybe even do a DIY?

Here's a hint for my next posting (which is coming in a couple days)!

Thursday, March 8, 2012

French Manicure 2.0 || Nail Art

I was thinking of doing just a regular french manicure since I work at a school as a substitute special educational assistant. But I really didn't want something that's too boring. I decided to add a bit of colour. Here are the results!

OPI Natural Nail Base Coat
Sally Hansen Complete Salon Manicure (130 Sheer Me Now)
OPI Nail lacquer (Party in my Cabana)
OPI Top Coat
Nail Art Stickers (from the Richmond Night Market)


This was my first time using this shade in the Sally Hansen. I don't think I put enough coats of it because its still streaky and sheer. I'm not sure if it's suppose to be that sheer but I would of liked it if it was more opaque. I still think it looks pretty good still.

Monday, February 27, 2012

Purple + Polka Dots || Nail Art

Inspiration: was watching my korean dramas and got bored. looked up on some cool nail art. got lazy and decided to do something simple.


Friday, February 17, 2012

Trying Trying Trying to be Healthy || Food for thought

This one is going to be short and simple. I told myself this year that I have to be healthy healthy healthy (or at least healthier). So far it's been so so. Been getting more sleep but sadly haven't been eating as healthy as I should be. Been snacking a lot; without a steady schedule from week to week, my eating habits aren't regular. Went out to Costco and what did I find? My favorite things to eat...granola, peanut butter, chocolate! What's the difference? It's been "Weight Watchers"-ed. During my last year of university, I tried following the weight watchers guide (mainly used their recipes) and I did trim off a few pounds. Maybe I should give it a try again :)


On a much happier note: been diving deeper into the Word and been wanting more and more (just like when I'm super hungry and want ramen). Since it's the month of February, I decided to focus on the idea of love. What is love? Is it more than just chocolate, flowers, and lovey-dovey chick flicks? I keep on thinking of how much I am loved by my family and friends and how much I love them. But how about those who can't find that love? As Christians, we have the duty to share that love. Christ has given us so much love through his death and resurrection. He promises that he will give us the love that we need and more. That "extra" love is something that we cannot keep and reserve. There are people all around us that need that warm comfort of Christ's love. I've been trying to live up to this and been loving the people around me. I give you the challenge to do the same.


Dear friends, let us love on another, for love comes from God. Everyone who loves has been born of God and knows God. This is how God showed his love among us: He sent his one and only Son into the world that we might live through him. This is love: not that we loved God, but that he loved us and send his Son as an atoning sacrifice for our sins. Dear friends, since God so loved us, we also ought to love on another. No one has ever seen God; but if we love one another, God lives in us and his love is made complete in us. -- 1 John 4: 7, 9 - 12

Monday, January 16, 2012

Mission: As long as no one get's food-poisoning... || 3D Small Group: Chopped Edition

Last friday was small groups for my university student fellowship. My (awesome) small group decided to do a variation of the TV show CHOPPED. If you've never heard of this, it's almost like Iron Chef but a bit more complicated. We decided to split into two teams and made it into a competition.We are given several ingredients and had to use them all. Goal was to make one appy and one entree. Secret ingredients were (...drum roll...) mangoes, a french baguette, and scallops for the appy and mixed spring greens, chicken, and maple syrup for the entree. What can you make with all these ingredients? Answer...odd combinations of course. There was definitely some heat in the kitchen! Like with any group gatherings that involves cooking, some minor casualties occurred (I burnt our sauce and a piece of baguette) but no one got hurt! Keri and Canaan (our lovely small group leaders and judges for the night) didn't get food poisoning...success! Here are some photos and Keri and I took during the night! BON APPETIT!


Obviously wasn't watching the pan.....


Hua Ping must be working really hard....SNACK BREAK!


So many people in the kitchen!!! I think we all violated the "one person from each team can be in the kitchen" rule ... oops!


Time's almost up...


Our fearless leaders! Omnomnomnomnom...


Who won you may ask?? Canaan and Keri decided that we all won (I think my team won lol)! But honestly, it doesn't really matter who won that night; we all had fun experimenting with the ingredients and, in the end, we all had our laughs.