Pages

Wednesday, April 25, 2012

Liese Bubble Hair Colour || Product Review

Time to re-dye my hair! The last time this was done was maybe in October and I can definitely see my natural hair color near the roots. So I thought it would be fun to do a quick product review.

I use to use the normal drugstore dyes like herbal essence or l'oreal. But I found that they didn't take to my hair when it came to color -- that's because my hair is naturally dark. So by the time I was done waiting for the dye to set, the color never change. But then I found the solution: Liese Bubble Hair Colour! Bubz from Bubzbeauty did a tutorial on how she dyed her hair and I loved her results! After this, I decided to try this product out. This dye is really hard to find, here in Vancouver, and if you do find it, it's pretty expensive. But I was lucky -- I knew a few people that were heading to Hong Kong and they helped me out  :) I've used several colours from this line and, every single time, it's turned out great! Easy to use, easy to clean up, it didn't stain my scalp (the worst), and the results are amazing!

Here's the quick info burst!

Where is it made? Product of Japan
How much did it cost me? $120HK - $140HK (roughly $15-20 CDN) per box.
Easy to use? The instruction sheet is super simple (has pictures to follow if you're not the reading type). The instructions comes in English, Chinese, and Japanese.
Some great things to mention:
It's foaming! I've used dyes which were in liquid form and the only way I was able to dye my hair with that was to get someone to help me. With the foaming formula, you can use it like shampoo! Another plus to this is that it doesn't dye my scalp as much as other dyes I've used. This works much better for dark hair; I'm guessing that it's made for asian hair (darker color).

What's in the box?
- instructions
- 1 bottle of dye (2 components)
- 1 pump
- 1 package of nourishing hair aftercare
- latex gloves


Things you will need
- 1 box of Liese Bubble Hair Colour (2 boxes if you have really long hair or just a lot of hair)
- a shirt that you don't care for
- clips (to hold up layers)


Before shot! Excuse my hair (morning hair)!
(Last dye used: Lieole Bubble Hair Colour "Platinum Beige")

Super Easy Steps!
  1. Wash your hair the night before and let it naturally dye.
  2. The next day, you can dye your hair. Just follow the instructions on how to mix it. Section off your hair into layers (I only needed three layers). Use as much of it as your hair allows. Refer to the link above to watch Bubz do if you need some visuals.
  3. Let the dye sit for 30mins. The package said up to 30mins, but I left mine in for a tad bit longer just because my roots were so dark. Watch a movie or a tv show. 
  4. Rinse, shampoo twice, and condition. I would suggest using a shampoo and conditioner that is specifically for coloured hair. This insures longer lasting colour. Right now I'm just using Herbal Essence's "Colour Me Happy" in shampoo and "Hello Hydration" in conditioner.
  5. Apply nourishing hair aftercare. You only need a little bit (around the size of a quarter).
And Voila!


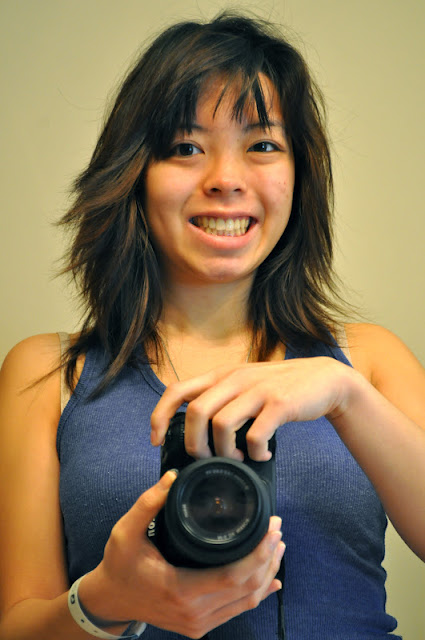
Sorry for the "pixelly" quality. Shot with my android.
Colour "Milk Tea Brown"


Saturday, April 14, 2012

Blossoms and Sunshine || Spring Time

Here's a quicky! I shot these yesterday right in front of my house while I was waiting from my ride. My camera hasn't seen natural daylight in months and it was nice to bring it outside again. These are just my favorite selections :) The cherry blossoms are in full bloom and, in a couple weeks time, they will become little leaflings (if that word even exists)! And you can't go wrong with moccasins -- bought them down in the States for a steal!

Oh! All you instagram-ers, I had an android now! So if you want to follow me, my username is nessahui. Follow me and I'll follow you :)


Next post: PRODUCT REVIEW!! FIRST ONE EVER!! GET READY!

Sunday, April 8, 2012

Bunnies and Mini Eggs || Nail Art

Happy Easter everyone! I wanted to post this one up yesterday night but ended up having to do a favor for my mom. So I know today is Easter and this is an easter nail tutorial but I think you can still wear this even when it's not Easter. Super easy to do and lots of fun! A couple of my favorite youtubers did some nail tutorials based on Easter themes! At first I was just going to do one of them but then I decided to mix and match.

Michelle Phan's Easter Nails
http://www.youtube.com/watch?v=XRq7kz8JKbA&feature=g-u-u&context=G25e4913FUAAAAPAACAA

Cutepolish's Bunny Nails
http://www.youtube.com/watch?v=bHBGYuM-vYk&feature=g-u-u&context=G234622bFUAAAAWgALAA

BubzBeauty's Pastel Bunny Nails
http://www.youtube.com/watch?v=UmB9BzmObGY&feature=g-u-u&context=G28e88c3FUAAAAAAAGAA


Here's my first attempt and I wore them for a few days. Got a whole bunch of positive comments!


I thought they weren't too bad but i found it was hard to match my outfits. So I decided to redo them. Alright here we go!

Colours used:

OPI Heart Throb (Light Bubble Gum Pink)
OPI Alpine Snow (White)
Sally Hansen Sheer Me Now (Light Nude/Peach)
Sally Hansen Raven (Black)
OPI Base Coat and Top Coat

1. Apply Base Coat.

2. Apply pink to thumb, middle, and pinky finger. Apply nude to ring finger. I had to apply a good three - four coats to get it to a solid shade. On the pointer finger, paint tip of nail with a curved edge (the head) and two ears with the white. I used a really thin tipped paintbrush to get the ears like that. Let dry.


3. With a nail art tool or a bobby pin, draw in your dots on the nude nail (pink polka dots) and all the pink nails (white polka dots). They can be as big or as small as you want them to be. For the bunny, use a nail art tool/bobby pink/paintbrush to paint the insides of the ears and the nose with the same pink. Use black nail polish for it's two eyes.


4. Apply Top Coat and you're done!


I hope you guys try this out -- just takes some time and patience :)

Remember, Easter isn't just about the chocolate eggs and the bunnies. This is the day when Jesus Christ rose from the dead to fulfill the promise that God had made. Christ is risen! He is risen indeed!

Monday, April 2, 2012

Inspriation via Youtube || Project April

Bahaha so much for my promise for posting at least two post each month. Sorry -- month of March was pretty busy and, sadly, haven't had much inspiration. I wanted to take some photos outside but the weather over here in Vancouver hasn't been the best. Since the weather hasn't been the greatest, I've been catching up on my youtube subscriptions to amazing people like Michelle Phan  and Bubz from Bubz Beauty. Love their videos -- their fashion and beauty advice are easy to follow! So I've decided to blog my responses to their videos by actually doing them! So I'm super excited for this month! Got a whole bunch of ideas for April - going to attempt a haul blog, some more nail art, and some product reviews. Maybe even do a DIY?

Here's a hint for my next posting (which is coming in a couple days)!